
Account Setup
This page walks through the shared setup steps for all ACE users. Whether you use the Policy Manager to enforce compliance on smart contracts or the Identity Manager to manage cross-chain identities and credentials, complete these steps first.
1. Create your organization
Go to app.chain.link and create an account or sign in.
Once signed in, click "My Org" in the bottom-left corner of the sidebar to open the Organization page. Your Organization ID is displayed in the page header — copy it.
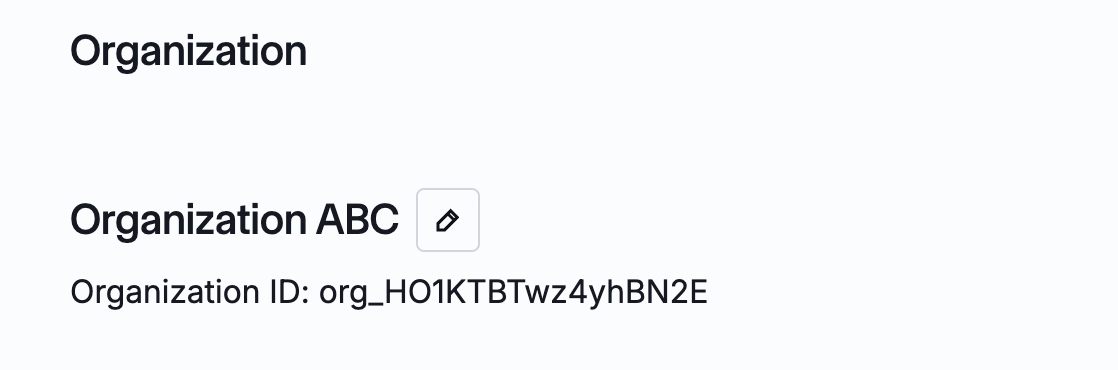
The Organization page showing your Organization ID in the header.
2. Share your Organization ID
Share your Organization ID with your Chainlink contact so they can enable the ACE service for your organization. You cannot create API keys or use ACE until this step is complete.
3. Create an API key
Once your account has been provisioned for the ACE service, create an API key for authentication:
- Log in to the Chainlink App, click "My Org" at the bottom of the left sidebar, then select the "APIs" tab.
- Click "+ Organization API".
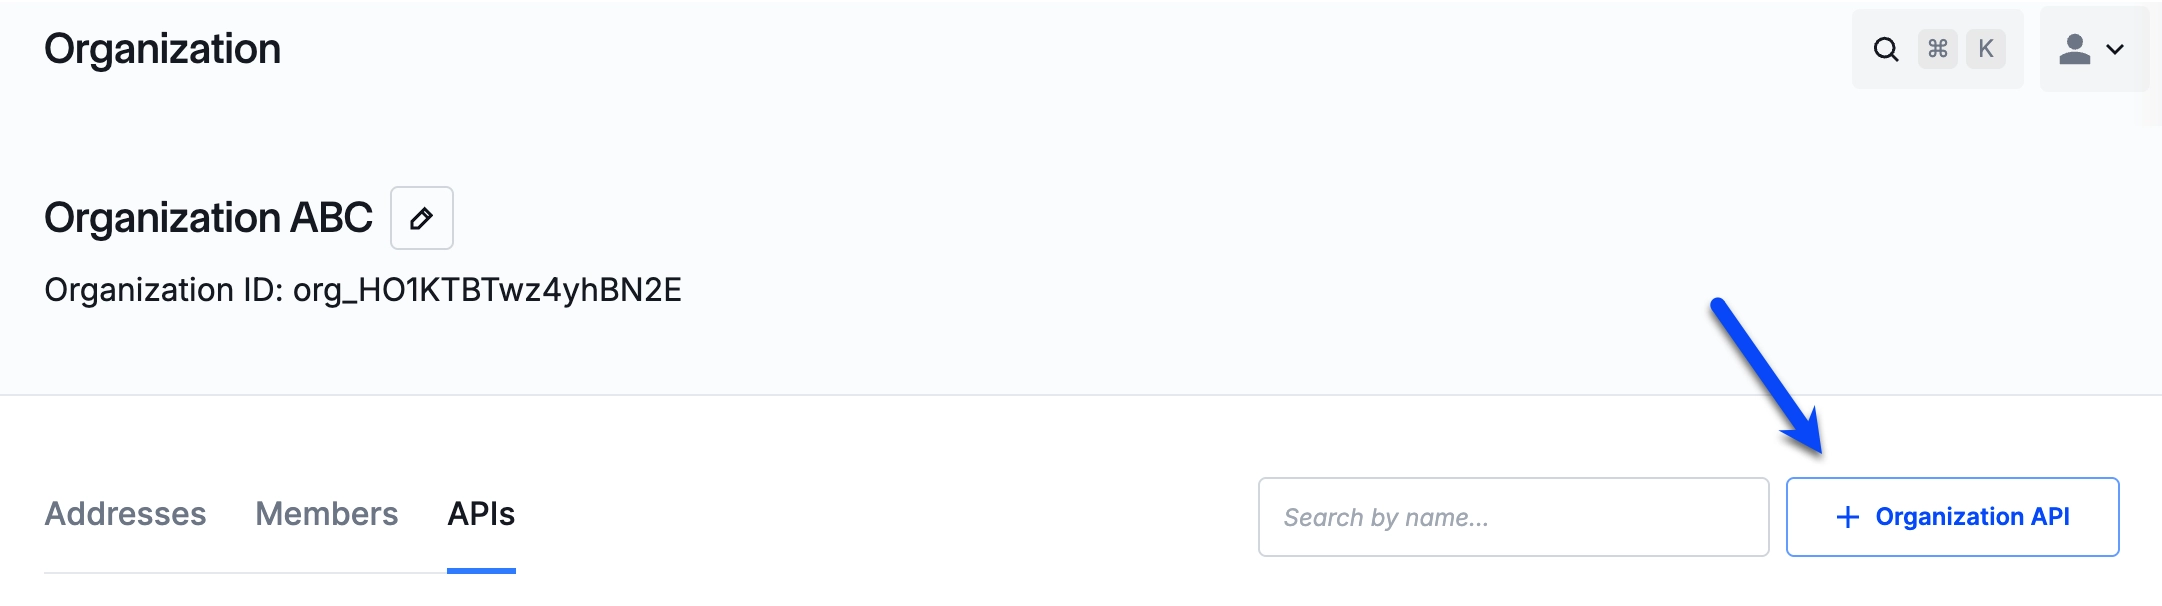
The APIs tab on the Organization page. Click '+ Organization API' to create a new key.
- Enter a name for the key and select an expiration period (1 day, 1 month, or 1 year).
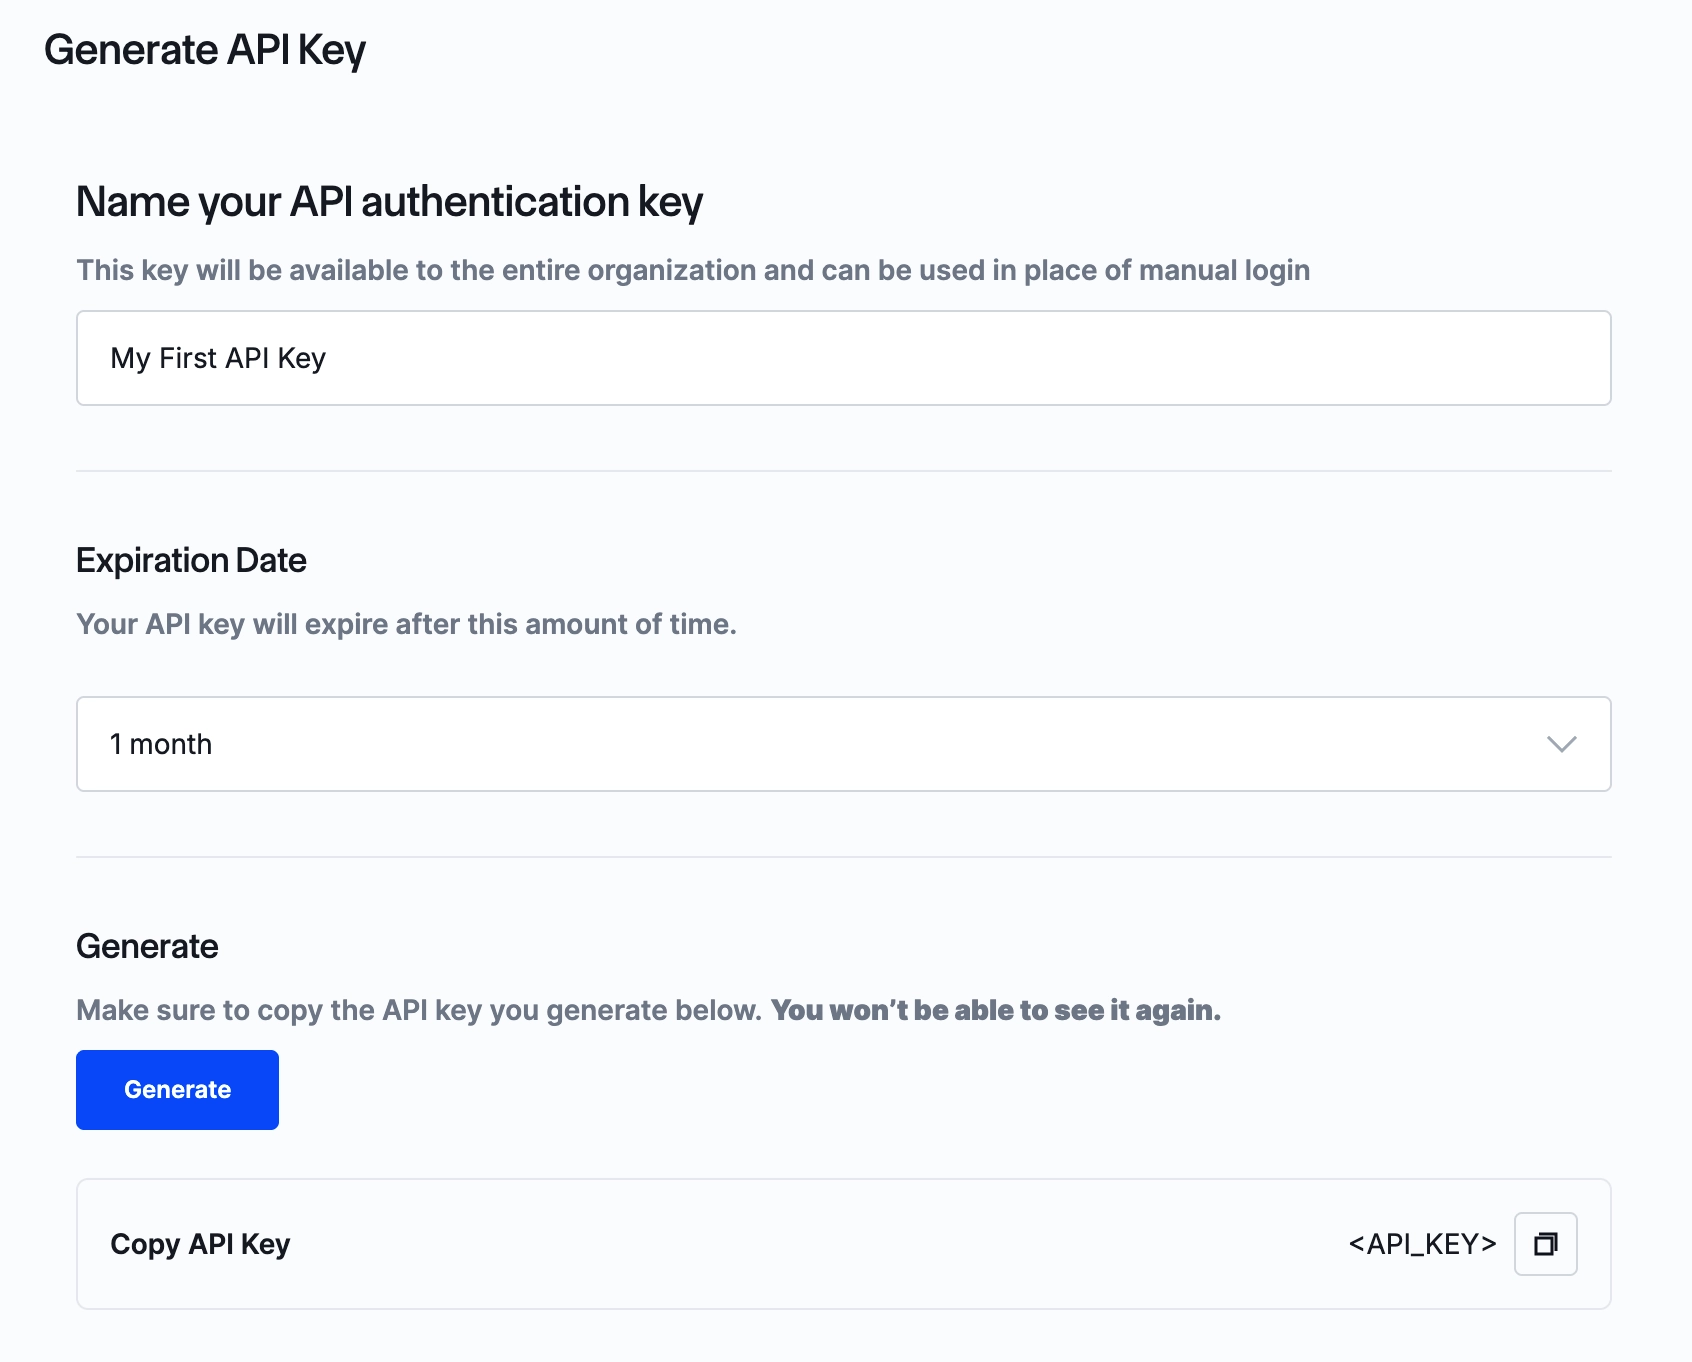
Enter a name, select an expiration period, and click Generate.
- Click "Generate". The API key is displayed once — copy it immediately.
You will use this key in the Authorization header for all Coordinator API and Reporting API calls:
curl https://ace.api.chain.link/v1/<endpoint> \
  -H "Authorization: Apikey <API_KEY>"
4. Set up CRE Connect Wallets
Before you can use ACE — whether from the Platform UI or the Coordinator API — you need a CRE Connect Wallet on each blockchain network where you want to operate.
A CRE Connect Wallet is a dedicated onchain smart contract wallet that acts as the execution gateway for all ACE actions on a given chain. When you trigger an action (deploy a policy engine, register an identity, issue a credential), the ACE platform executes the blockchain transaction through your CRE Connect Wallet. For a full explanation of how the signing and ownership model works, see Signing & Ownership Model.
Key points:
- One wallet per chain. You need a CRE Connect Wallet on every network where you plan to use ACE. See Supported Networks for available chains.
- You own it. The
owner_addressyou provide when creating the wallet becomes the owner of the CRE Connect Wallet onchain. - Chainlink operates through it. Chainlink is registered as an authorized operator — allowed to execute operations on your behalf, but unable to change ownership or authorization settings.
- Self-signing organizations must also provide the
addressof the ECDSA signer authorized to sign operations. See Signing & Ownership Model for details on how each signing model works.
- In the Chainlink App, open the Compliance section from the left sidebar and click Home.
- Click View Settings, then click Enable new network.
- Select the network you want to enable and provide an EOA address as the wallet owner. To deploy wallets on multiple chains at once, click Add more to add additional networks before submitting.
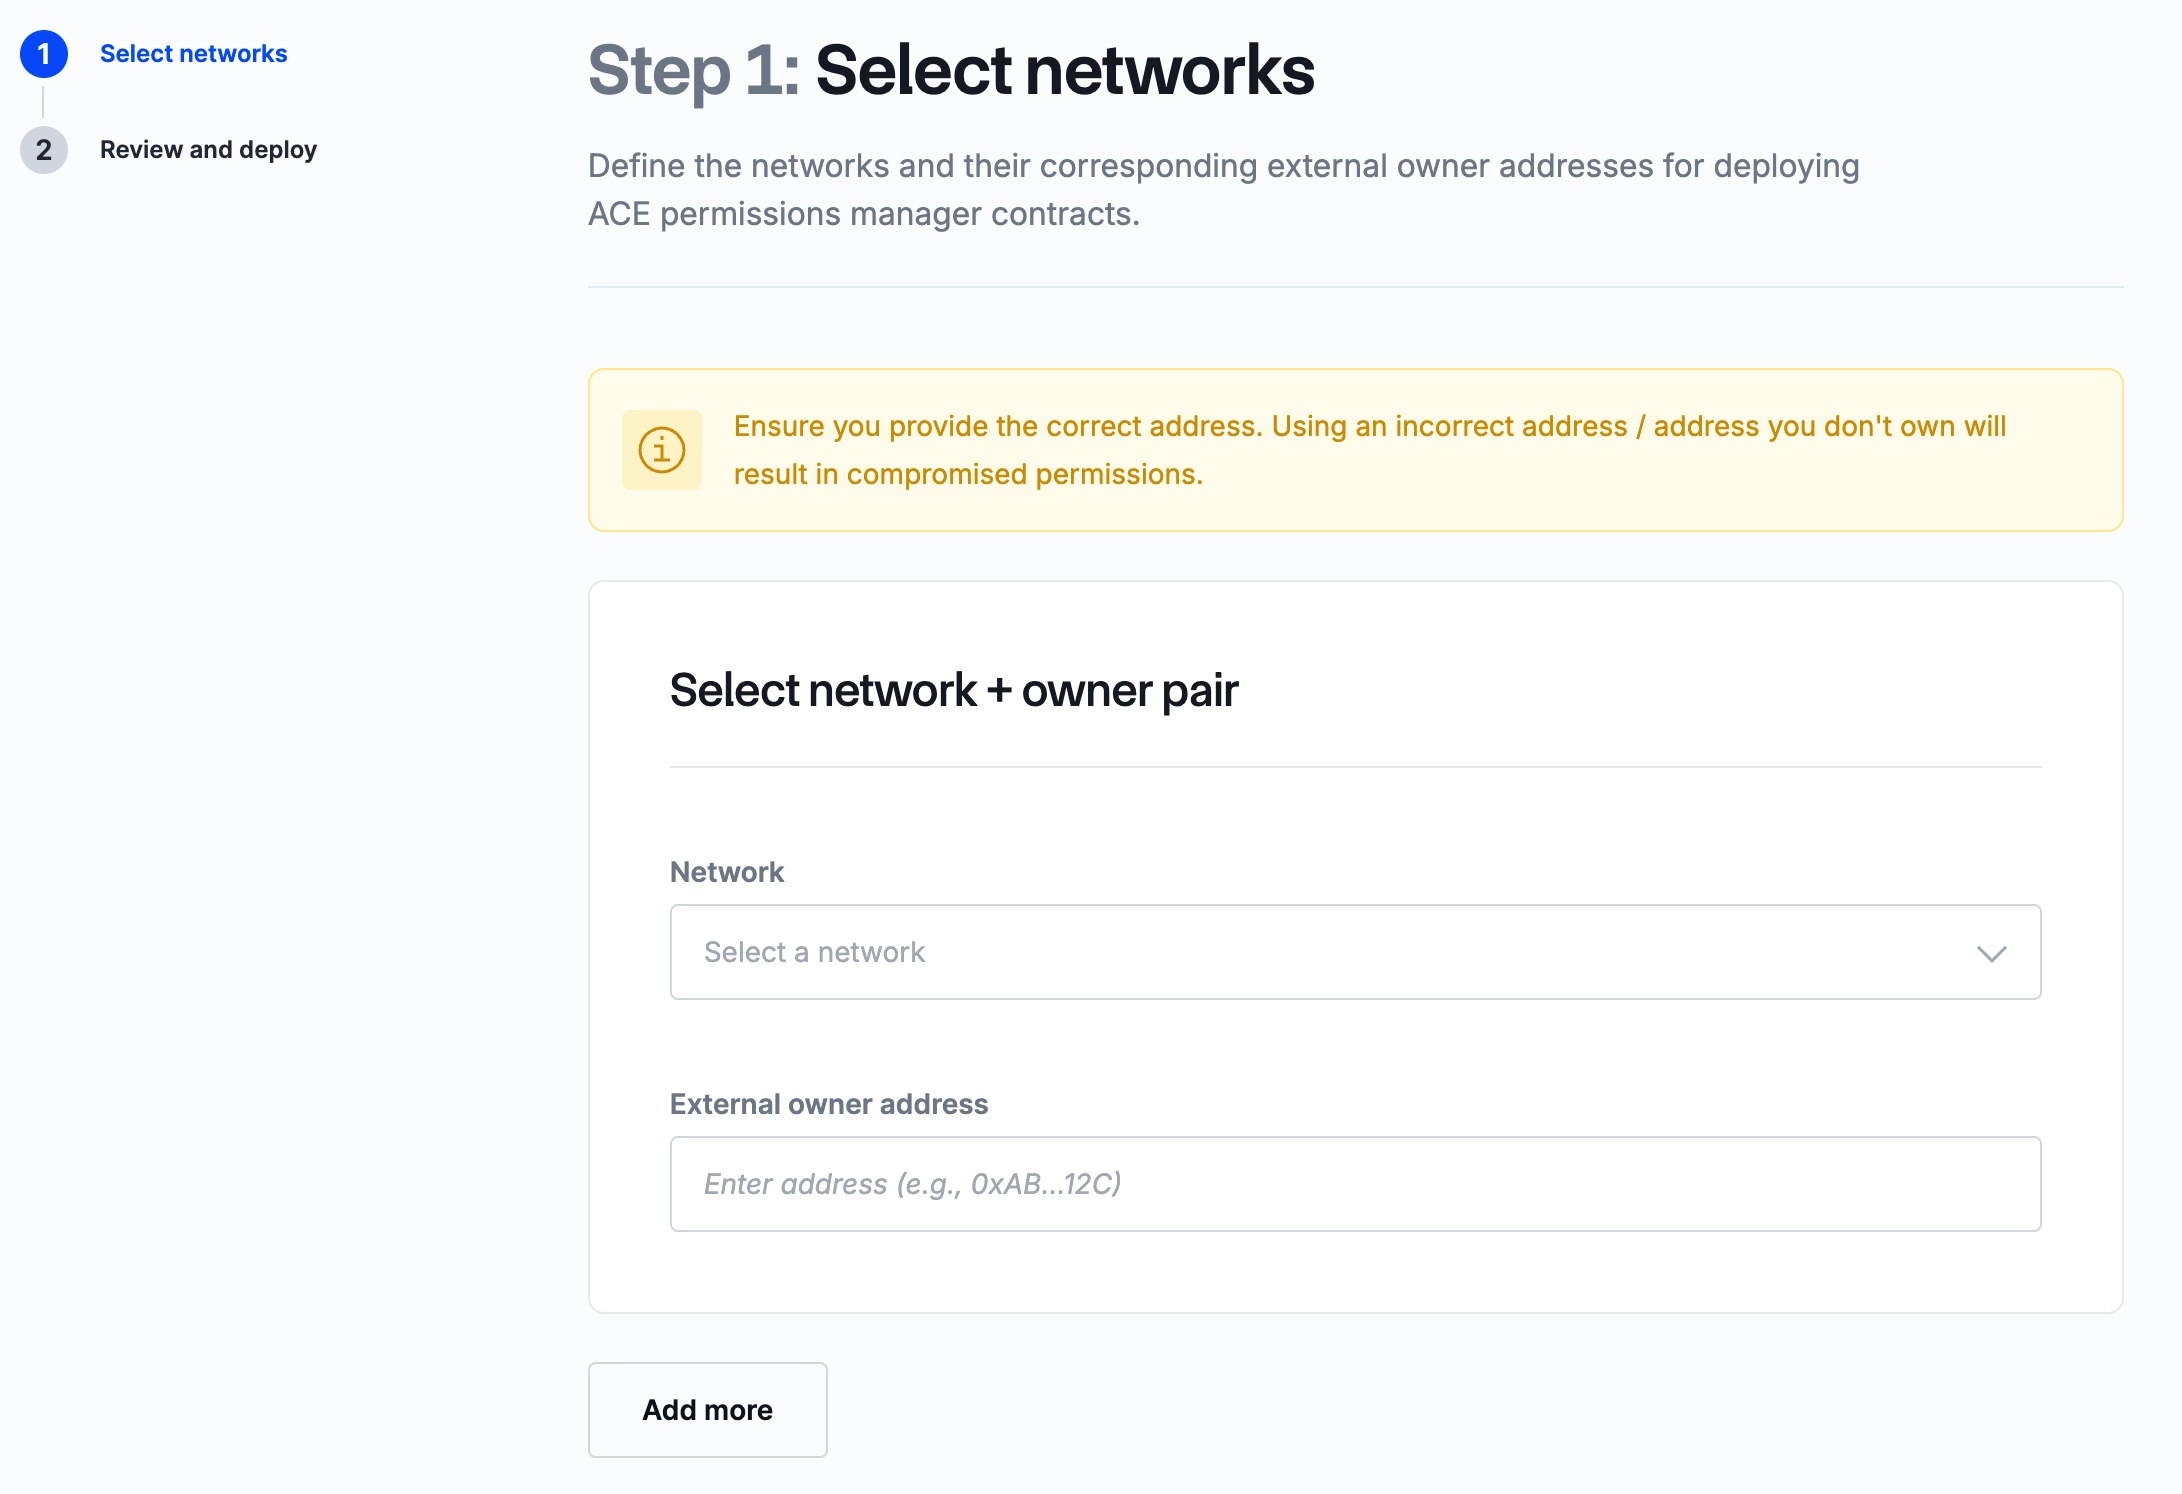
Enable a new network by selecting a chain and providing an owner address. Click 'Add more' to deploy on multiple chains.
- The platform deploys your CRE Connect Wallet onchain. Once created, the wallet appears in your settings with its onchain address and deployment status.
The Coordinator API identifies networks using chain selectors — unique numeric identifiers used by Chainlink infrastructure to reference specific blockchains. These are different from standard chain IDs. You can find the chain selector for each supported network on the Supported Networks page.
Create wallets on one or more networks in a single request. The owner_address is the EOA that becomes the onchain owner of the CRE Connect Wallet. This example creates wallets on Ethereum Sepolia and Arbitrum Sepolia:
curl -X POST https://ace.api.chain.link/v1/wallets \
  -H "Content-Type: application/json" \
  -H "Authorization: Apikey <API_KEY>" \
  -d '{
    "wallets": [
      {
        "owner_address": "<YOUR_WALLET_ADDRESS>",
        "chain_selector": "16015286601757825753"
      },
      {
        "owner_address": "<YOUR_WALLET_ADDRESS>",
        "chain_selector": "3478487238524512106"
      }
    ]
  }'
The response includes the deployed wallet address and status for each chain:
{
  "wallets": [
    {
      "id": "3fa85f64-5717-4562-b3fc-2c963f66afa6",
      "org_id": "org-123",
      "chain_selector": "16015286601757825753",
      "owner_address": "0x1234...5678",
      "wallet_address": "0xabcd...ef01",
      "status": "created",
      "created_at": 1775580000,
      "updated_at": 1775580000
    },
    {
      "id": "8b2e1c4a-9f3d-4a7b-b6e8-1d2f3a4b5c6d",
      "org_id": "org-123",
      "chain_selector": "3478487238524512106",
      "owner_address": "0x1234...5678",
      "wallet_address": "0x9876...5432",
      "status": "created",
      "created_at": 1775580000,
      "updated_at": 1775580000
    }
  ]
}
Verify your wallets at any time:
curl https://ace.api.chain.link/v1/wallets \
  -H "Authorization: Apikey <API_KEY>"
For the full API schema and parameters, see the Coordinator API Reference.
What happens next
Your next step depends on what you need to do:
| If you need to... | Next step |
|---|---|
| Enforce compliance policies on smart contracts | Deploy a PolicyEngine and integrate your contract. Continue to the Policy Manager Quick Start. |
| Manage cross-chain identities and issue credentials | Set up identity and credential registries. Continue to the Identity Manager Quick Start. |
Many organizations do both. Start with whichever is most relevant to your first use case — the quick start guides cross-reference each other where the workflows intersect.